Launching your own Game on Saga
Part 1: Launch your own chain in minutes
Introduction
Web3 has come a long way since its early days. In the early 2010s, it was common to use a Command-Line Interface (CLI) just to create a Bitcoin wallet. Even today, it takes experienced crypto teams months to launch their own chain. But now, with Saga, you can launch your own chain in under 10 minutes!
This blog post is the first of a series designed to walk you through the steps of launching your own chain that can host its own game, whether the game is fully on-chain, meant to store gamestate in real time or only has in-game assets on chain. In crypto today, most games choose to launch on monolithic chains they do not control, where developers are limited by the design choices that are specific to that chain. But on Saga, where developers can launch their own chain, there is a far greater degree of flexibility, customizability and throughput that a developer can have access to. In this series, we’ll show you some of the basics of deploying your own chain on Saga while also demonstrating the unique things that one can do with Saga that isn’t possible in other ecosystems. Specifically, we’ll show you how you can:
- Launch your own EVM chain with its own block explorer, web-sockets and RPC endpoints in minutes.
- Connect your Chainlet to popular EVM developer-tooling like Remix to build and deploy smart contracts directly to your chain.
- Deploy pre-compiled NFT minting contracts onto your own chain.
- Deploy an NFT exchange and build a tokenized in-game economy.
- Demonstrate the power of your own dedicated EVM chain, such as streaming live game events directly to your own chain.
In the first blog post of this series, we’ll go through the steps required to install the Saga CLI and connect your own EVM chain to an RPC Node. Consider this blog post as a follow-on guide to this video that is a tutorial on how to use Saga’s CLI and is a complement to our best-in class developer documentation.
Cassiopeia Testnet Demo — Launch your own chain in 5 mins
Without further ado, let’s dive in.
Step 1: Download and Install Saga CLI onto your local machine
Navigate over to https://docs.saga.xyz/getting-started/download-saga-cli to get started on downloading the Saga CLI. Instructions on which file to download are dependent on the type of operating system one is utilizing.
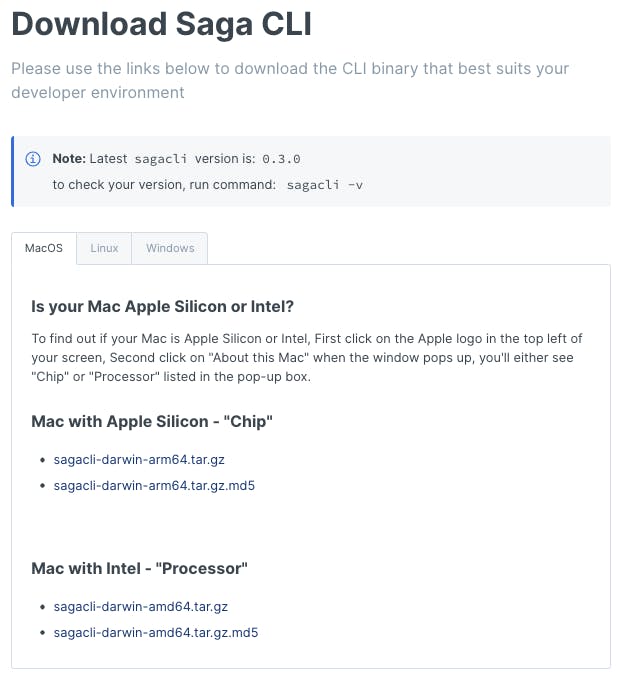
This author is utilizing an older Macbook so will install the “Mac with Intel — Processor” link to download the Saga CLI. Unzip the file that was just downloaded and drag and drop ‘sagacli’ into an open terminal window.
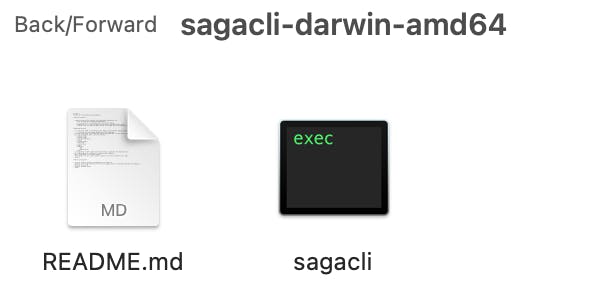
You should see something like this:
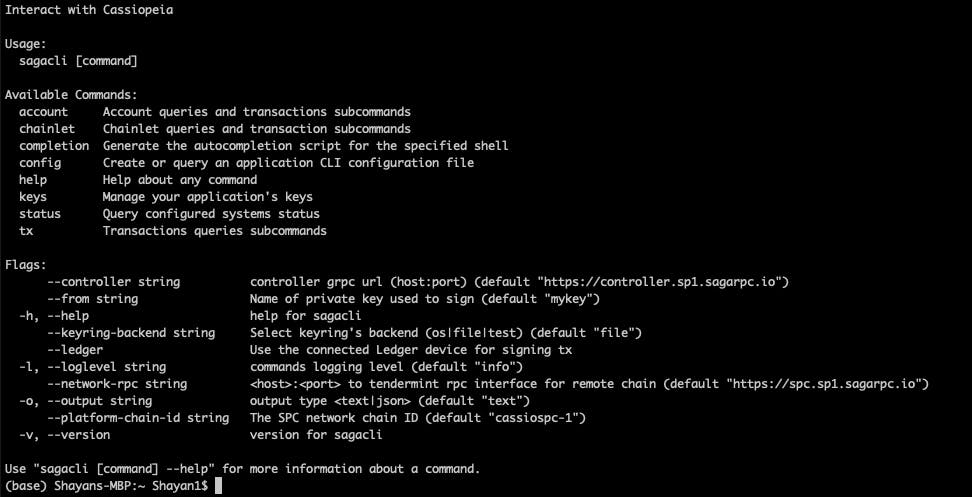
In case these steps didn’t work for you, click on the following link for instructions on how to download and install the sagacli. Utilize the following command to confirm that you have the sagacli downloaded onto your local machine:
command: sagacli — version
Step 2: Configure Saga CLI
The sagacli executable communicates with our Cassiopeia server applications securely over HTTPS. Before you can start using sagacli, one must configure it to talk to the Saga Platform Chain as well as Saga Controller. Let’s execute the following commands in our terminal window (https://docs.saga.xyz/getting-started/configure-saga-cli) to configure the sagacli:
command 1: sagacli config network-rpc https://spc.sp1.sagarpc.io
command 2: sagacli config controller https://controller.sp1.sagarpc.io
command 3: sagacli config platform-chain-id cassiospc-1
To check whether we are connected to the proper endpoints, run the following:
command: sagacli status
If everything is working okay, one should see the following. It may take a few mins for the network to be configured properly:

Step 3: Create a Public/Private Key
Type into your terminal window in:
command: sagacli keys add <keyname>
<keyname> will be the name of the Chainlet that you are choosing to launch. In this situation, I have decided to name my chain ‘npc-chain’. You may be asked to type in a passcode on your terminal in order to create the public/private key pair. You should see something along these lines after this command.

The ‘private key’ that was created to control this Chainlet is the 24 words that you see at the bottom of the screenshot above starting with ‘twin orient’ and ending with ‘field connect’. Store this passphrase in a secure location as it can be used to control your Chainlet. This private key is associated with the public key:
saga1tn5lcq2guqt4cwv5zem37uytmh8mutrgfkdwag
For more details on how to import your own private key, check out this link. For the creation of a Chainlet, only one private/public key is required so let’s move to the next section of managing an account and launching a chain.
Step 4: Funding your account
Chainlets are launched on Saga via accounts. Accounts are used to manage your Saga token balance and execute various transactions to fund operations on top of the Saga Platform. To see the types of functions enabled via accounts type the following:
command: sagacli account — help
and you should see:
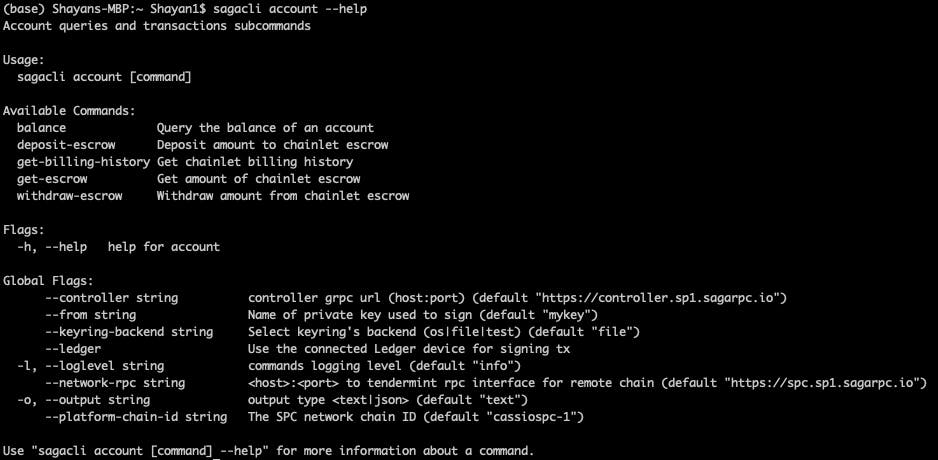
In order to get ‘balance’ associated with an specific account, write out the following:
command: sagacli account balance
You should be able to see your account is funded. Your account NEEDS to be funded in order to launch a Chainlet. If your account is not already funded, try the following:
command: sagacli account get-tokens <faucet airdrop key>
The <faucet airdrop key> is a unique passphrase that is required to get faucet tokens and is something that is made available to projects and teams that are part of the Saga Innovator Program. If you are part of a team that is in the Innovator program, and the above command does not work, please reach out to your contact at Saga to request test tokens to your account.
If you are not part of the Innovator Program, we would encourage you to join by clicking on this link, and someone will assist you shortly.
For this author, the account is already funded with 330 $tsaga tokens.

Step 5: Launching your own Chain
Now that we have configured the proper endpoints and have an account that is funded, you are finally ready to launch our own chain! For a brief refresher, Saga’s platform chain allows for the provisioning of your own EVM-compatible chain called a Chainlet. To be able to access this service, validators must be compensated for their infrastructure costs of running a Chainlet. As a result, a developer must pay $SAGA tokens into a fee deposit to provision a chain for a predefined amount of time. To start the process of funding a Chainlet, let’s type in the following:
command: sagacli Chainlet launch sagaevm 1.0 npcchain — dac-enable — maintainer <saga_address> — genesis-account <metamask address>:1000000 — denom <name of token>
To break down this long command, we will be launching an EVM chain, hence the use of the word ‘sagaevm’. The account launching the chain is the <saga address>, and this EVM chain will be connected to my personal metamask which is within <metamask address>, and <name of token> will be the name of the network token for my chain (limited to 6 characters or less).
For my own CLI, the command looks like the following:
command: sagacli Chainlet launch sagaevm 1.0 npcchain — dac-enable — maintainer saga16vh8v3nhh2gmjrxfhd4ltvv9qjlt36k5z8fr5n — genesis-account 0xB2a79aA36fACBcE31c8Bb05b057cF364BB7541d7:1000000 — denom shay
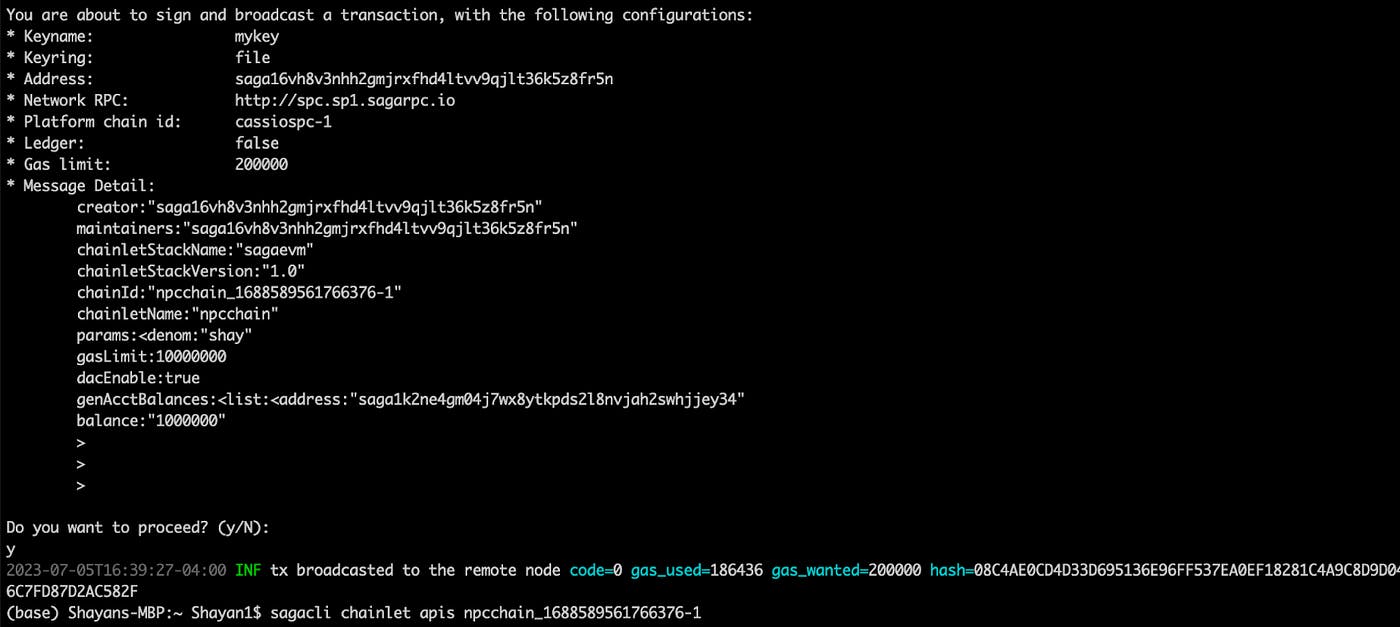
And …. we have now launched a Chainlet! But how can we be sure?
Step 6: Connecting your Chainlet to a block explorer and Metamask
And there we go! We have a funded Chainlet that is live on Cassio test-net. Now let’s go ahead and check out what our chain is doing. Type in the following:
command: sagacli Chainlet apis <chainId>
personal command: sagacli Chainlet apis npcchain_1688589561766376–1
You should see a few endpoints like these:

Copy + paste the explorer endpoint into your web browser, and now you can see all the blocks that are being produced in real-time for your own chain.
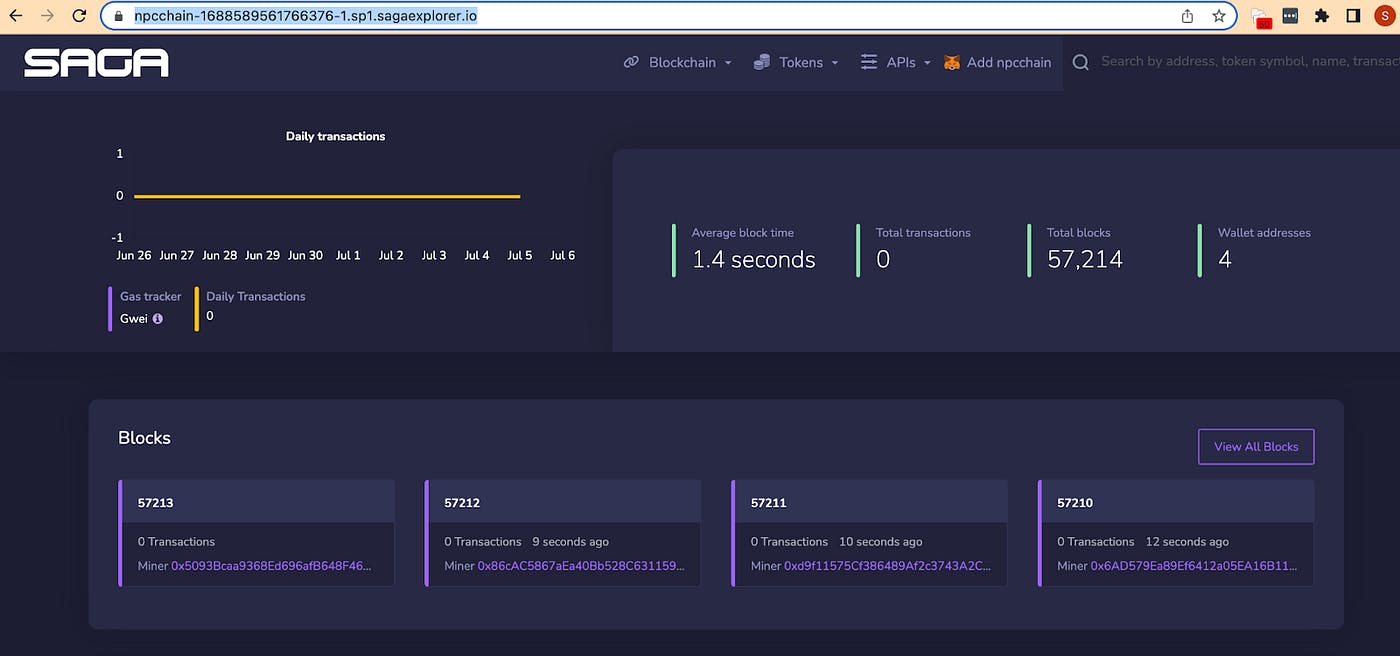
Follow the instructions on this page to link your Chainlet to a Metamask account.
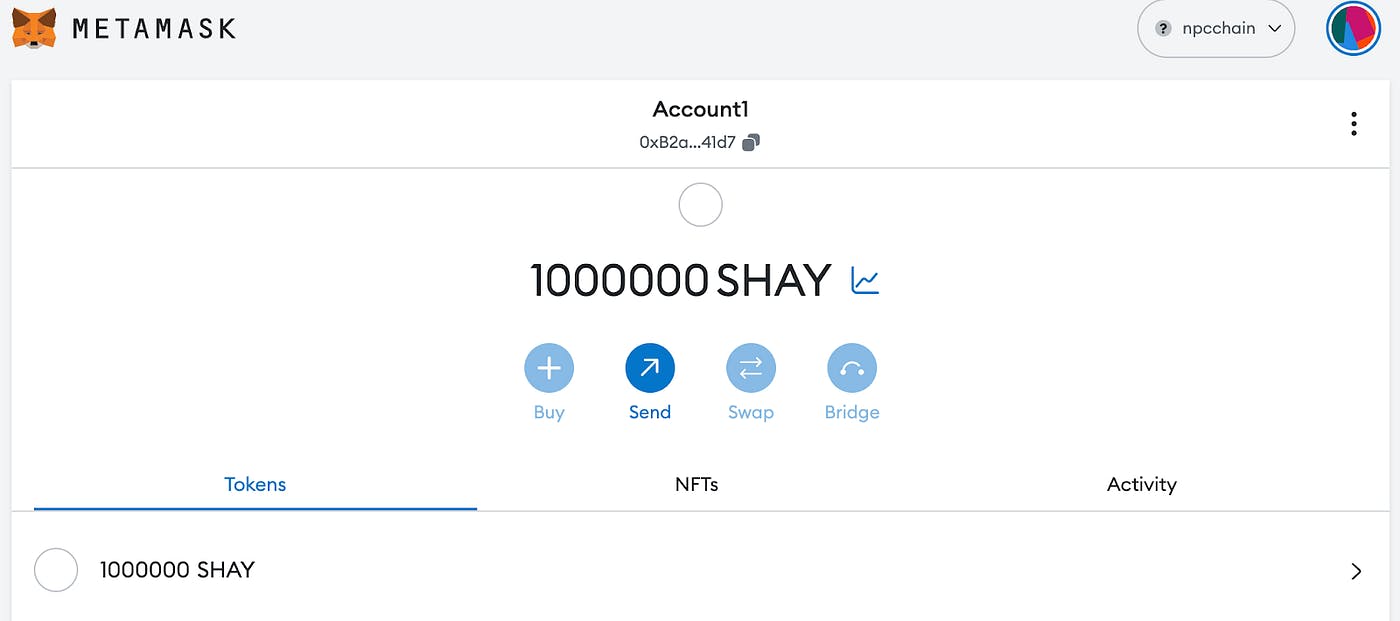
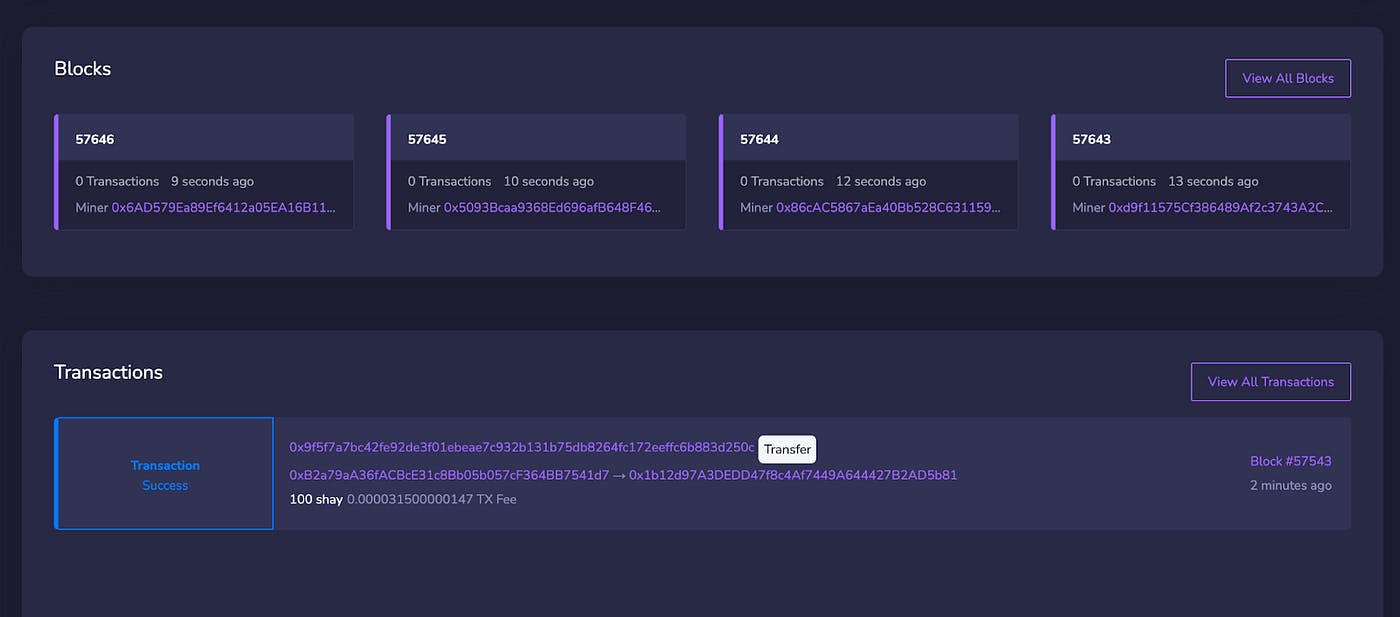
Now we have a new EVM chain that has its own block explorer and is connected to Metamask, the dominant wallet for EVM chains and EVM applications! As a final step, let’s go ahead and send some $SHAY tokens to another address. This can be easily done in Metamask by clicking on the ‘Send’ button and selecting an address. Once the transaction is confirmed, it should pop up on your block explorer as well.
In the next blog post, we’ll discuss how to connect your Chainlet to other EVM and Solidity tools to start writing applications to your own chain!
Step 7: Maintaining your Chain & Community Funding
Now that we have a working Chainlet with a functioning block explorer, let’s go ahead and check how much of the fee deposit is left. Try the following:
command: sagacli account get-escrow <chainId>
personal command: sagacli account get-escrow npcchain_1688589561766376–1
We will see that if your chain has been running for a few days, the amount of tokens remaining in the fee deposit is less than the amount that was deposited.

The reason for this is that validators must be compensated for their infrastructure costs for providing validation services for your chain. What makes Saga unique is that this fee deposit escrow account can be maintained by anyone, not just the Chainlet developer. This ensures that even if a Chainlet developer leaves, the activity on their Chainlet can be maintained by community members or other users. One can add to the fee deposit for a chain with the following:
command: sagacli account deposit-escrow <chain-id> <amount to deposit> — from <key name or account address making the deposit>
personal command: sagacli account deposit-escrow npcchain_1688589561766376–1 20 — from saga16vh8v3nhh2gmjrxfhd4ltvv9qjlt36k5z8fr5n
By adding 20 tsaga tokens to the fee deposit, I have ensured that this Chainlet will be live for at least 2 more days!

Conclusion and Next Steps
So let’s summarize what we’ve done over the course of the tutorial. We have installed the sagacli binary to our local machine, connected it to Cassio testnet and then created/imported a public/private key pair on the testnet. Using that public/private key, we funded our account and used those funds to launch our own EVM chain. The EVM chain is connected to Metamask to initiate a token transfer, which can then be seen via the block explorer.
In the next blog post, we will learn how to deploy smart contracts onto our Chainlet and get started with building on-chain elements of a game!
To learn more about Saga’s approach to blockchain gaming, click here. Follow us on Twitter or join our Discord.