Stack Explorer: Democratizing Blockchain Development using Saga’s No-Code Solutions (Saga under the hood)
Introduction
Creating your own blockchain is tough. Developers have to be experts in blockchain infrastructure, juggling the security, decentralization and scalability of their setup.
Developers have to manually piece together data availability, consensus, execution, and settlement, all while managing the blockchain trilemma (security, decentralization, and scalability) separately for each part.
With the sagacli launching your own blockchain is now achievable in less than 10 minutes! However, using the CLI requires some technical hurdles — we can make it even easier. With the Saga Web App, it can be done in less than 1 minute!
In this article, I am going to briefly explain how to launch your own blockchain (or chainlet) using the Saga Web App, and what happens when you deploy a chainlet under the hood.
The Saga Web App
Before utilizing the web app, ensure you have a wallet like Keplr that supports Cosmos SDK-based blockchains. If you are new to the Keplr Wallet, follow this tutorial for installation and getting started.
To get a chainlet in the Saga Web App, you need to connect your Saga wallet and simply fill out the form:
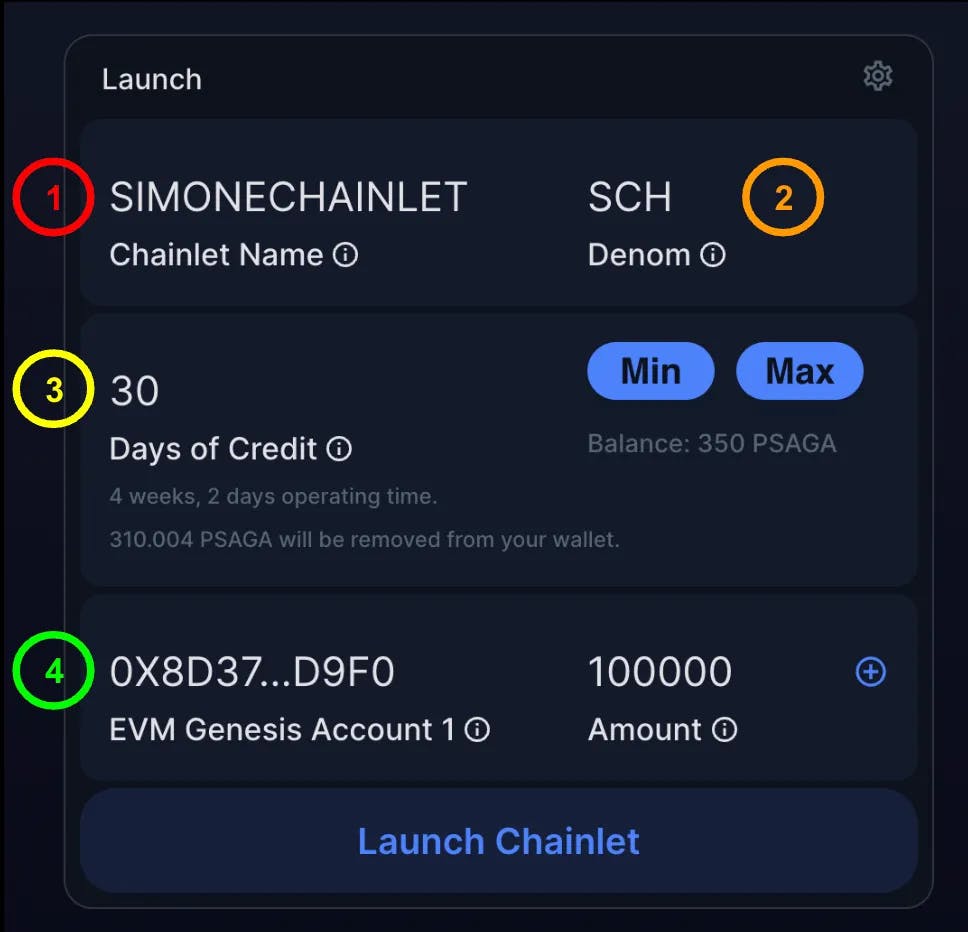
- The name of your chainlet (this case SIMONECHAINLET)
- The Demon or simply the main currency of your chainlet (this case SCH)
- The Number of days of Chainlet operation that will be credited to the escrow account.
The cost is SetupFee(10 psaga) + (num of days * 10psaga/day), so in this case 10 + ( 30 * 10 ) = 310 psaga (+ gas fee for the launch) - The EVM address and the desired amount of full tokens ( SCH )
You can also fill in 2 Advanced options by clicking the cog on the top right corner:
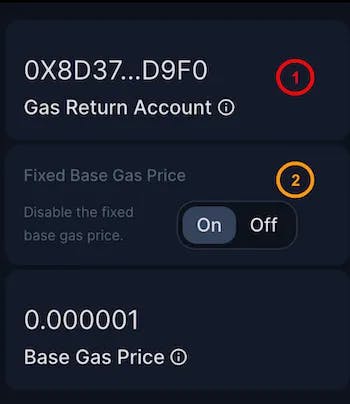
- Gas Return Account: Which is the designed wallet that will collect all fees paid by users for transactions executed to interact with the Chainlet.
- Fixed Base Gas Price: Which is the base gas price per unit of transaction gas.
If you’re interested in the details about these two features, please read Stack Exploder: Exploring the Innovative Horizons of Pegasus Incentivized Testnet
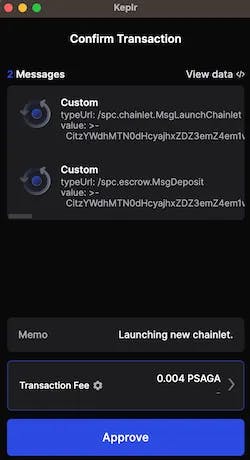
Once you’re finished, just click “Launch Chainlet” and you’ll receive a prompt from the Keplr wallet to approve this transaction. Click “Approve,” and the Chainlet will be launched!
If everything is done correctly, you will see that the Saga Web App brings you to this screen.
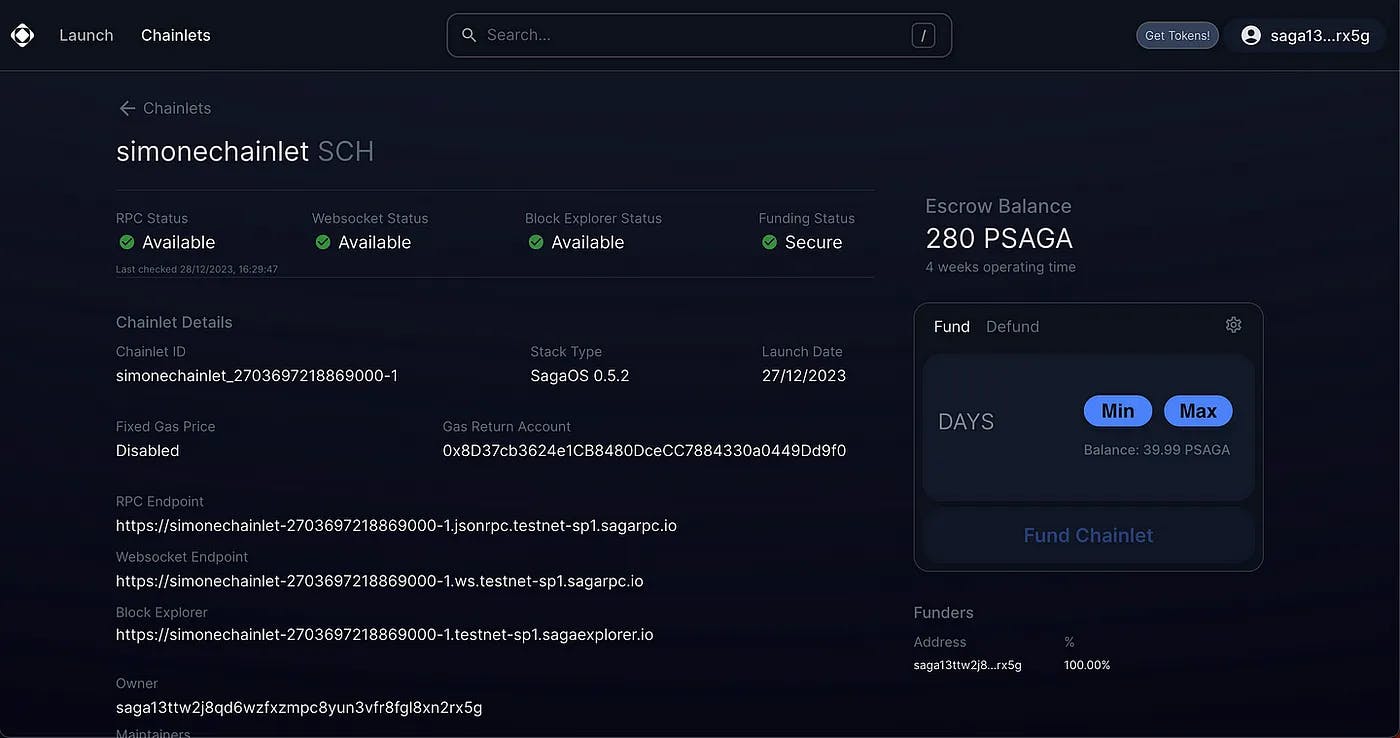
Congratulation now you have your own personal chainlet which come with:
- A dedicated RPC and WebSocked endpoint (Essential if you intend to deploy a smart contract in your Chainlet.)
- A dedicated block explorer
But now, let’s see what happens under the hood when we deploy a chainlet.
Saga under the hood
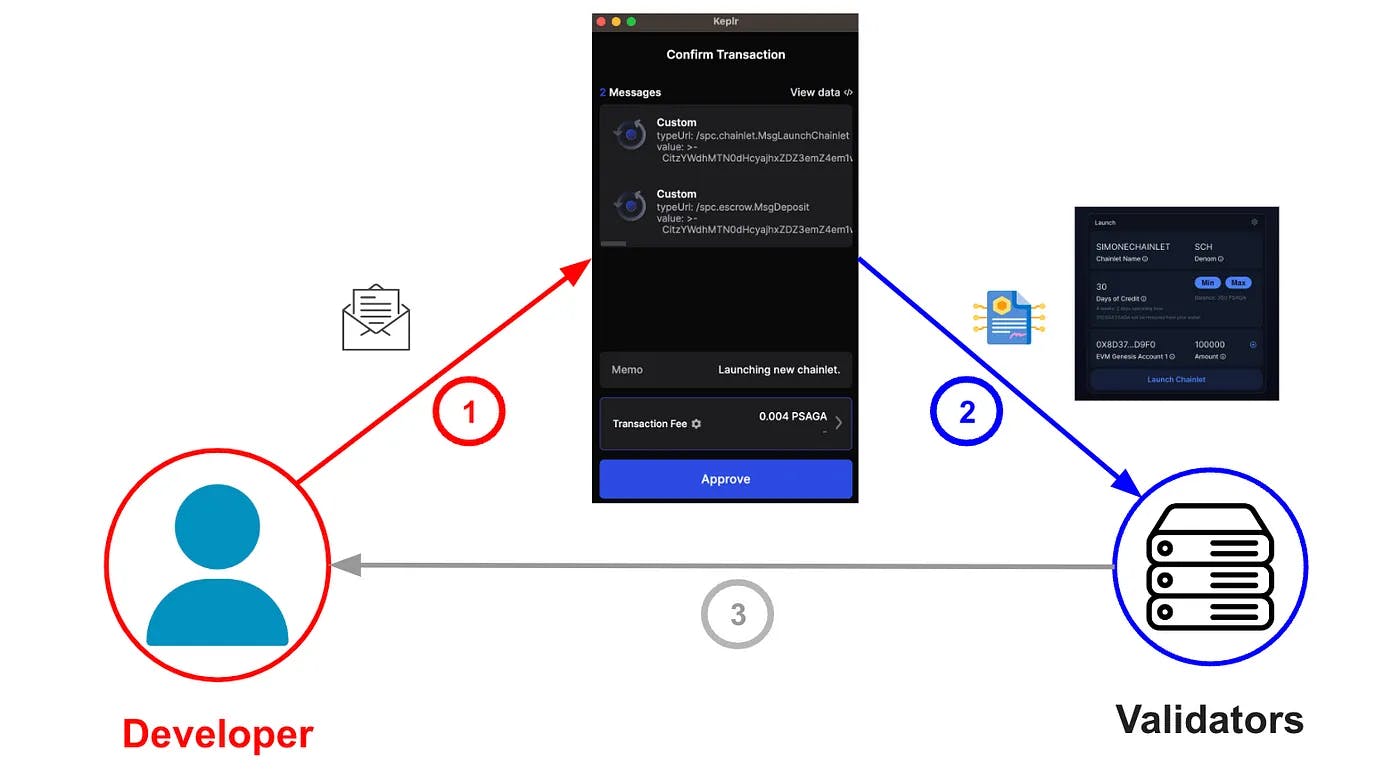
(1) Developers initiate a chainlet request on the Saga controller chain by submitting a transaction through the Keplr wallet.
(2) This transaction, which includes all the input fields filled in the Saga Web App, serves as the formalized request.
(3) Validators consistently monitor the Saga controller chain, promptly identifying incoming chainlet requests, and subsequently executing the provisioning of the requested chainlet.
Within this robust system, validators have already curated a whitelist of chainlet versions, with the initial version being an EVM-based chainlet (allowing developers to deploy Solidity smart contracts on their own chain).
However, the architecture allows for flexibility in accommodating diverse virtual machines (VMs), various consensus technologies, and potential future innovations.
Subsequently, the provisioning of additional infrastructure such as RPC and block explorer, is handled by Saga’s service provider stack.
Chainlets not only solve performance issues via horizontal scaling but also contribute to a more user-friendly and predictable blockchain in Saga architecture.
In a monolithic blockchain, developers are subject to the main chain’s token prices, governance decisions, and development pace.
Saga distinguishes itself by abstracting away these dependencies, granting developers autonomy and flexibility in economic and governance aspects without being tied to a specific technology.
This approach enhances the overall usability and predictability of the blockchain for both developers and end-users.
Conclusion
In summary, creating your own blockchain used to be tough for developers, but with sagacli and the Saga Web App, it’s become much easier — taking less than 10 minutes or even just a minute.
We explained the steps to launch your own blockchain using the Saga Web App.
Each chainlet you create includes key elements such as RPC and WebSocket endpoints, as well as a personal block explorer. These components are vital, particularly if you intend to deploy smart contracts.
Under the hood, we explored how each chainlet is requested on the Saga Mainnet, giving developers flexibility with their own VM module and EVM support for deploying Solidity smart contracts.
In conclusion, the nature of Chainlet components, including the VM module, SDK, and Tendermint Core, allows for independent upgrades, providing flexibility and adaptability. Chainlets not only address performance issues through horizontal scaling but also contribute to a more user-friendly and predictable blockchain in the Saga architecture.
The distinction becomes evident when comparing with monolithic blockchains, where developers are constrained by the main chain’s token prices, governance decisions, and development pace. Saga sets itself apart by abstracting away these dependencies, offering developers autonomy and flexibility in economic and governance aspects without being confined to a specific technology.